HowTo connect a Mylyn repository to Redmine
- Table of contents
- HowTo connect a Mylyn repository to Redmine
These instructions should work with redmine 0.9 stable and up.
There are 2 options to connect Mylyn to redmine: either install the connector in your redmine install (this obviously needs the ability to install a plugin on the redmine you want to use it with), or use the generic web connector, which scraps the html pages for the information it needs, and thus should work with pretty much every up-to-date enough redmine installation out there.
Using specialized Redmine-Mylyn connector
The Redmine Mylyn Connector is under "volatile" development. So you will find multiple pages and forks, here are some jump points.
http://www.redmine.org/boards/1/topics/10923
http://sourceforge.net/projects/redmin-mylyncon/ - Eclipse 4.x : https://github.com/ljader/redmine-mylyn-plugin
http://danmunn.github.io/redmine_mylyn_connector/ (Currently, https://github.com/joaopedrotaveira/redmine_mylyn_connector has better Redmine 3.x.x compatibility)
The sourceforge way
The Redmine-Mylyn Connector is another solution providing better integration with Mylyn (Note: for version 2 of Redmine, the updated redmine plugin can be found here and also an updated Redmine connector plugin for Eclipse (Mylyn) which solves some problems with newer versions (Eclipse 4.x) is here).

Using the generic web repository connector
Mylyn is an Eclipse plugin for task management.
This HowTo explains how to connect to Redmine using the generic web repository connector.
Note that the generic web repository connector is not part of the default Mylyn install.
So, you have to install it first from the _incubator_ update site.
Create a Task Repository
- Right-click on the task repositories list and click Add task repository
- Choose Web Template (Advanced) and click Next
- Configure the repository:
Server:                 http://www.redmine.org -- Replace it with the URL of your Redmine instance
Task URL:               ${serverUrl}/issues/
New task URL:           ${serverUrl}/projects/foo/issues/new -- Replace foo with the identifier of the project used for new tasks
Query request URL:      ${serverUrl}/issues
Query pattern:          <td class="subject">.*?<a href="/issues/(\d+)">(.+?)</a></td>
Login request URL:      ${serverUrl}/login?username=${userId}&password=${password}&authenticity_token=${loginToken} [POST]
Login Form URL:         ${serverUrl}/login
Login Token Pattern:    <input name="authenticity_token" type="hidden" value="(.+?)">
If you have problems with login, maybe try this (mind the end
Login Token Pattern: <input name="authenticity_token" type="hidden" value="(.+?)" />
Example:

You can replace the Query request URL parameter with the following if you want to get only the issues that are assigned to you:
${serverUrl}/issues?set_filter=1&assigned_to_id=meThe following Query pattern value reads Status, Owner and Tracker fields too (Mylyn 3.2.1) :
<td class="tracker">({Type}.+?)</td><td class="status">({Status}.+?)</td>.+?<td class="subject">.*?<a href=".*?/issues/({Id}\d+)">({Description}.+?)</a></td>({Optional}<td class="assigned_to"><a href.+?>({Owner}.+?)</a></td>)?
Status is read as "uncomplete" or "complete" in Eclipse.
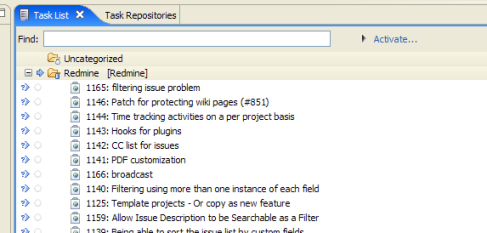
Create a Query
- On the task list, right-click and choose New -> Query...
- And select your newly created repository
Web Templates on Redmine 3.3+
The following information applies to Redmine versions 3.3+ and Eclipse Neon (4.6) and will make use of the REST Interface and API Key. (Also see screenshots above on where to find the configuration options.)
Prerequisites
Installed Redmine 3.3+, Eclipse 4.6+
Add MyLyn Incubator: http://download.eclipse.org/mylyn/incubator/latest/
Install Mylyn Tasks Connector: Web Templates (Advanced) (Incubation)
Add new MyLyn Repository
Server: your server URL
Label: Your Label
check "Anonymous" box
Click Additional Settings, add 3 Parameters:
key -> your API key
projectId -> your project name
limit -> 100
Click Advanced Configuration
Task URL: ${serverUrl}/issues/
New Task URL: ${serverUrl}/projects/${projectId}/issues/new
Query Request URL: ${serverUrl}/issues.xml?key=${key}&project_id=${projectId}&limit=${limit}
Query Pattern: <issue><id>({Id}\d+)<\/id>.*?<tracker id="\d+" name="({Type}.*?)"\/><status id="\d+" name="({Status}.*?)"\/>.*?(?:<assigned_to id="\d+" name="({Owner}.*?)"\/>.*?)?<subject>({Description}.*?)<\/subject>
Leave the rest as is.
Create new Query
Adapt Parameters, if necessary. You can add your own parameters to taylor the list further. For example to only query your own tasks use:
${serverUrl}/issues.xml?key=${key}&project_id=${projectId}&limit=${limit}&assigned_to_id=me
Or you could create a custom query in Redmine, then synchronize only the tasks corresponding to that query (you can find the query ID in the page URL):
${serverUrl}/issues.xml?key=${key}&project_id=${projectId}&query_id=${queryId}
More information can be found inside the REST Documentation
General notes
If you want to use the connection as mentioned above via HTTP, you need to adapt the Login Token Pattern.
It is with current Redmine versions as follow:
<input type="hidden" name="authenticity_token" value="(.+?)" />