Plugins Directory » Testcase Management Plugin by Redmineflux
|
|
Author: | Zehntech Technologies Inc |
|---|---|---|
| Website: | https://www.redmineflux.com/product/redmine-plugins/testcase-management/ | |
| Code repository: | - | |
| Registered on: | 2026-06-10 (about 1 month ago) | |
| Current version: | 6.3.0 | |
| Compatible with: | Redmine 6.1.x, 6.0.x, 5.1.x, 5.0.x | |
| User ratings: |
The Testcase Management Plugin for Redmine helps QA teams manage the complete software testing lifecycle from a single platform. It allows users to create and organize test cases, execute test runs, track defects, manage requirements, monitor requirement coverage, and generate detailed reports. With built-in traceability and centralized test management, teams can streamline their testing process and deliver high-quality software directly within Redmine.
Key Features of Redmineflux Testcase Management Plugin
- Create and manage test cases with detailed steps and expected results.
- Organize test cases into test suites and nested sub-test suites.
- Create and manage multiple test environments for different testing scenarios.
- Import test cases in bulk using CSV files.
- Move or copy test cases between test suites using drag-and-drop.
- Create and manage test runs with configurable environments, assignees, and watchers.
- Include all test cases or select specific test cases while creating a test run.
- Track test runs with configurable states, start dates, and end dates.
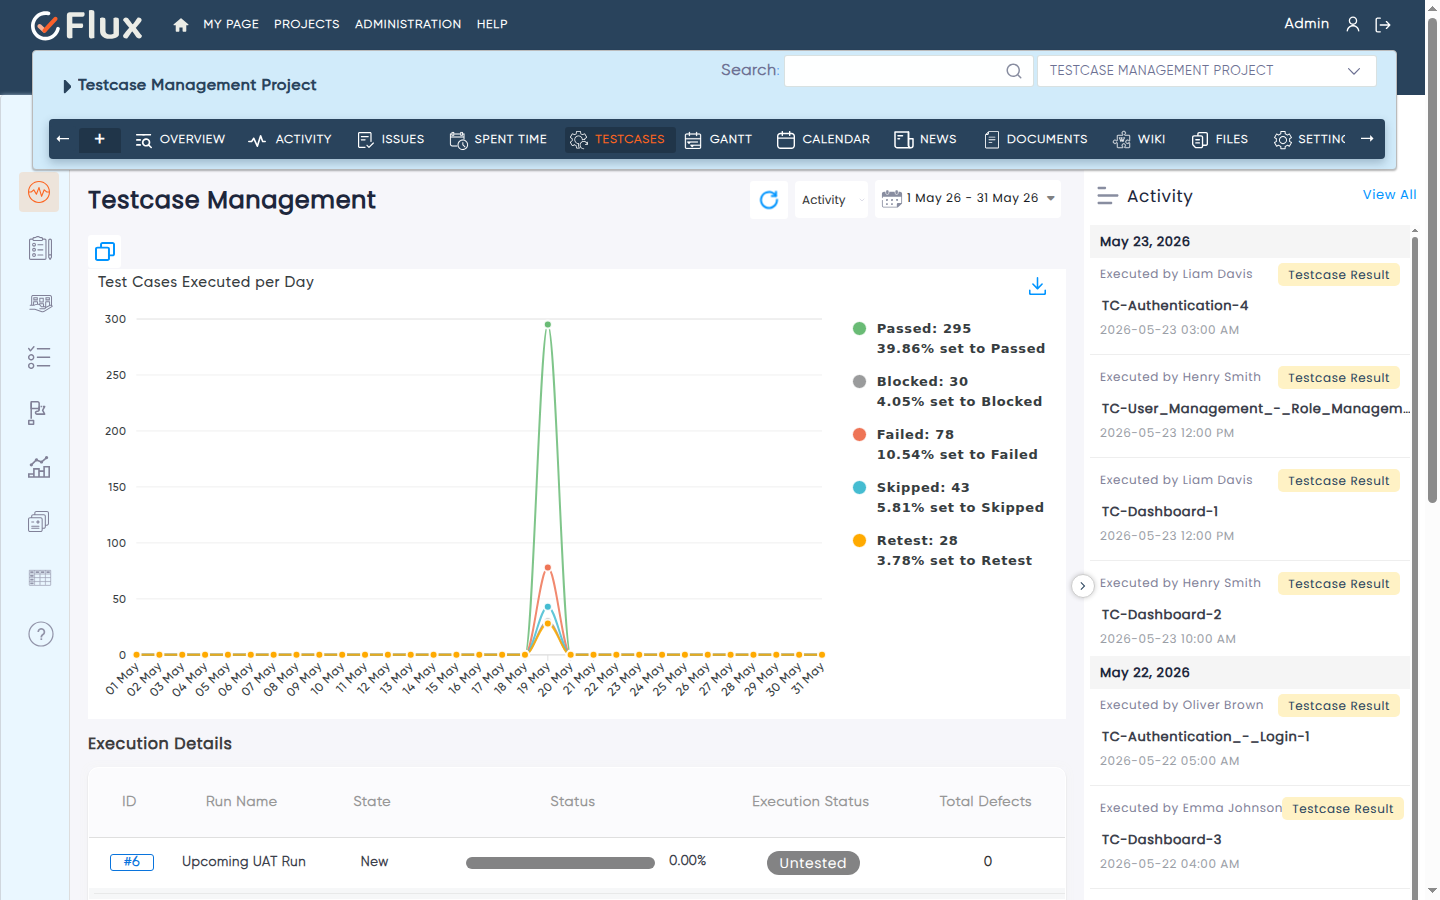
- Execute test cases and record results such as Passed, Failed, Blocked, Retest, Skipped, and Untested.
- Create new defects or link existing defects directly during test execution.
- Attach files and add execution notes for better test documentation.
- Execute test cases directly from the Test Run or Test Case Detail page.
- Create and manage requirement documents with predefined templates.
- Link requirements with test cases for complete requirement traceability.
- View requirement coverage using the Traceability Matrix.
- Add requirements to multiple test cases using bulk operations.
- Mention users and link test cases directly within requirement documents.
- Generate Test Summary, Defect Summary, Activity Summary, Tester Scorecard, Requirement Coverage, and Overdue Run reports.
- Schedule reports and configure email notifications.
- Download reports in PDF and HTML formats.
- View execution history, recent activities, and latest executed test runs from the Overview page.
- Track pending testing activities using built-in To-Do management.
- Filter test cases based on defects, execution results, priority, and other criteria.
- View graphical insights for test execution and testing progress.
- Configure custom run types to match your testing workflow.
- Customize email templates for test runs and testcase notifications.
- Configure role-based permissions for test suites, test runs, execution, reporting, and requirements.
- Receive email notifications for test runs and test execution activities.
Installation notes
Follow the below steps for installation:
- Make sure you have a working installation of Redmine.
- unzip the plugin and copy it to redmine_root/plugins or copy the archive in the same location and perform the unzip command in the console
- Run the following command from the Redmine root directory to install the plugin dependencies:
bundle install
- Run migrate command for database migration:
RAILS_ENV=production bundle exec rake redmine:plugins:migrate
- Install Redis (if not already installed)
- On Ubuntu/Debian
sudo apt update
sudo apt install redis-server
- On macOS (using Homebrew)
brew install redis
- On Ubuntu/Debian
- Start Redis
sudo service redis-server start
- Install Node.js and Puppeteer
A Node.js environment is required for the plugin. Follow these steps to set it up
1. Ensure Node.js is installed (if not, install it from the Node.js Official Website).
2. Add Puppeteer as a dependency in your package.json file:
3. “puppeteer”: “^22.8.2”
4. Install Node.js dependencies by running:
5. npm install
6. Install the necessary browser for Puppeteer:
7. npx puppeteer browsers install chrome - Start Sidekiq for Background Jobs Sidekiq is required to process background jobs for the plugin. Start Sidekiq using
bundle exec sidekiq
- Start Sidekiq for Background Jobs
Rails s
- Login as an administrator.
- Navigate to the Administration tab from the top menu.
- Click on Settings and find the API tab and enable the rest API
- Restart Redmine
- To access the Testcase Plugin in your Redmine instance, log in and select your preferred project. Then, enable the Testcase Management module and save the changes. You can also access the multi-project Testcase Management from the application menu.
3. Explore All Premium Redmineflux Plugins
- Redmineflux Helpdesk Plugin
- Redmineflux Knowledge Base
- Redmineflux Gantt Chart
- Redmineflux Timesheet
- Redmineflux Time Tracker Desktop App
- Redmineflux Agile Board
- Redmineflux Checklist
- Redmineflux Fluxshot Chrome Extension
- Redmineflux Issue Template
- Redmineflux Custom Dashboard
- Redmineflux Workload
- Redmineflux Notification
Explore All FREE Redmineflux Plugins
Explore All Premium Redmineflux Themes
Changelog
6.3.0 (2026-06-10)
Compatible with Redmine 6.1.x, 6.0.x, 5.1.x, 5.0.x.